Once the calendar is created, you can add events to the calendar.
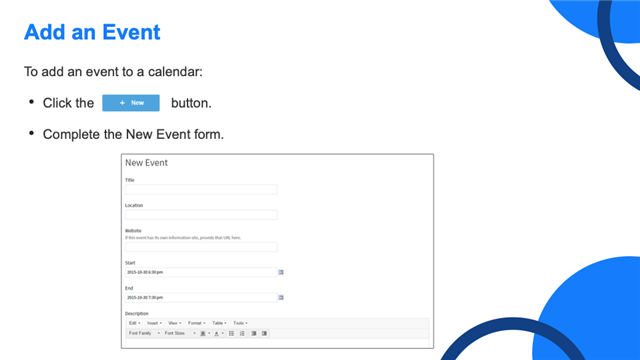
On the graphic below you see the instructions for creating an event within a calendar.
To create an event within a calendar:
- Click the New button in the upper right corner of the group where the calendar resides.
- If you are on the group home page. when you click the New button, you may see multiple calendars available. You will choose the one that you want to create an event within.
- If you are on the calendar home page, when you click the New button, you will be immediately prompted to fill out the New Event form.
- Fill out all the details related to the Event. The Title, Location, Website (if applicable) Start and End Dates, and a Description.

Before you click the Save button, consider the Registration type you want.
There are four different registration options available when you create a calendar event.
- No registration required: In this case, there is no registration, invitation, or confirmation associated with the event.
- Registration (no RSVP): Users navigate to your event and register for it, and they are automatically saved a spot and are registered for the event. You may use an invitation with this registration method.
- Registration (RSVP): Similar to open registration, it allows a user to fill out the registration form, but he/she is not confirmed for attendance until someone manually approves the registration. You may use an invitation with this registration method.
- Invitation only: There is no registration form for this event. Users must be invited to the event.
Lastly, click Save to create the Event.
[_____]
