
Memory Use
By default, solr is configured to use 512MB of memory. For larger indexes, this may not be enough. To do this, you'll need to open up bin\solr.in.cmd in the Search installation directory. At the bottom of the file, add the following line (Replacing 1g with the amount of memory you want to assign):
set SOLR_HEAP=1g
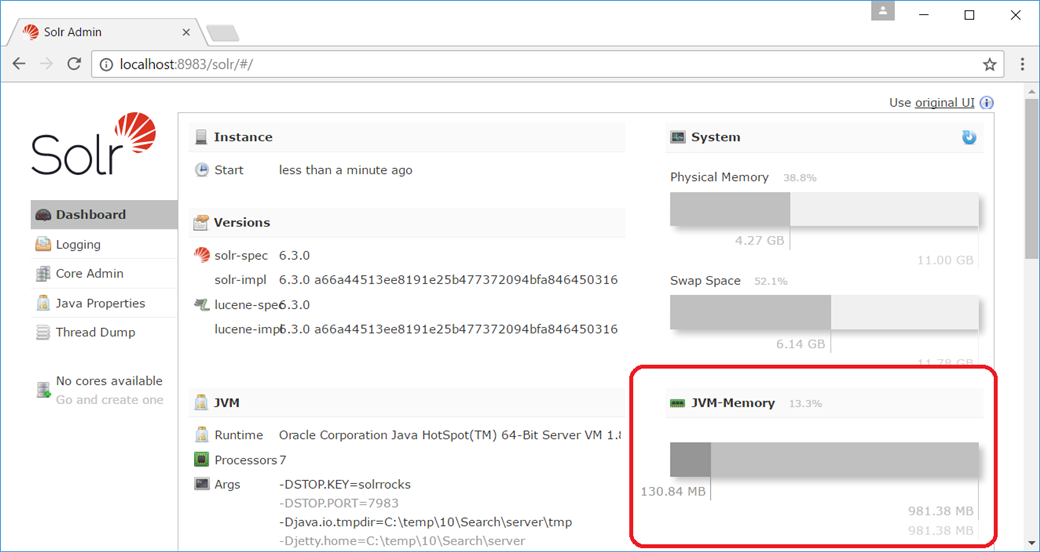
Save the file, then restart the Search service. You can verify the new memory limit has been applied by looking at the JVM-Memory graph on the solr dashboard. The dark grey bar shows how much memory solr is currently using, whilst the lighter gray shows how much memory is available for solr to use.
Running Multiple Communities on a single solr instance
If you need to run multiple instances of Telligent Community, rather than setting up separate instances of solr you can host multiple cores in the same instance of solr. (Much like you can host multiple databases inside a single instance of SQL Server)
Each core needs to be given a name, as well as the name of a config set that contains the configuration for the config set. These config sets can be found at data/home/configsets . These can be created through solr's HTTP API.
POST http://localhost:8983/solr/admin/cores?action=CREATE&configSet=telligent-content-cb15392&name=mycommunity-content
POST http://localhost:8983/solr/admin/cores?action=CREATE&configSet=telligent-conversations-de63a3d&name=mycommunity-conversations
If you do host indexes for multiple communities on a single instance, we recommend you remove the default indexes and re-create them with your own names - that way you don't risk cross contaminating your communities if you leave two instances pointing at the default cores.
Multiple Instances
In general, you should prefer setting up multiple cores on a single instance rather than set up multiple instances of Telligent Search. If you really need to set up multiple instances rather than multiple cores, you can provide some additional options to the install script
.\ServiceInstall.ps1 -ServiceName 'MyCommunitySearch' -DisplayName 'MyCommunity Search' -Port 6789
For more details, use PowerShell's Get-Help function.
Get-Help .\ServiceInstall.ps1
Solr Cloud
Solr Cloud allows you to setup solr up as in a highly available active-active cluster. Refer to the solr documentation for details on how to set this up.
Note that solr cloud is non trivial to set up - if you're not careful you can set up a cluster that is less reliable than a single node.
Rebuilding the Index
Under extreme circumstances (e.g. corrupted data, version upgrade incompatibility) you may need to rebuild/reset your search indexes.This can be done through the administration within the site or manually.
Keep in mind the following prior to rebuilding your index on a live site:
- During the re-indexing period your search services will not be fully functional on your site.
- You will not get all of the search results returned until the search process has finished. Content that has been indexed at the time of the search will be returned.
- The indexing service can be processor intensive so you may want to perform these operations in off hours.
Rebuilding the search index from Administration
- As an administrator, go to Administration -> Site -> Search.
- Deselect all types and click Save. Note: If you are intentionally not indexing certain types (ex. status messages), remember to keep those types disabled on the next step.
- Re-enable all types you want indexed and click Save.
Manually rebuilding the search index
There are two cores (indexes) within the Solr instance, "telligent-content" and "telligent-conversations" To delete one or both of the cores the following tasks need to be performed:
Delete the existing cores indexes
- Stop the "Telligent Search" service using the Windows Services MMC.
- Navigate to the "telligent-content" core folder in the Solr home folder (ex. c:\Search\data\home\telligent-content\) and delete the data folder.
- If also re-indexing conversations, navigate to the "telligent-conversations" core folder in the Solr home folder (ex. c:\Search\data\home\telligent-conversations\) and delete the data folder.
- Restart the "Telligent Search" service.
Set the content to be re-indexed
To set the content to be re-indexed, you need access to the Community database where the content is contained to run SQL scripts against the database.
Execute the following to reset all content (this does not include conversations):
exec te_SearchIndex_ReindexAllDefaultContentTypes
Execute the following to reset all conversations:
update dbo.te_ConversationMessages set IsIndexed = 0
Additional Topics
- Read about the .
- Learn how Verint Community now leverages Synonyms to improve search.