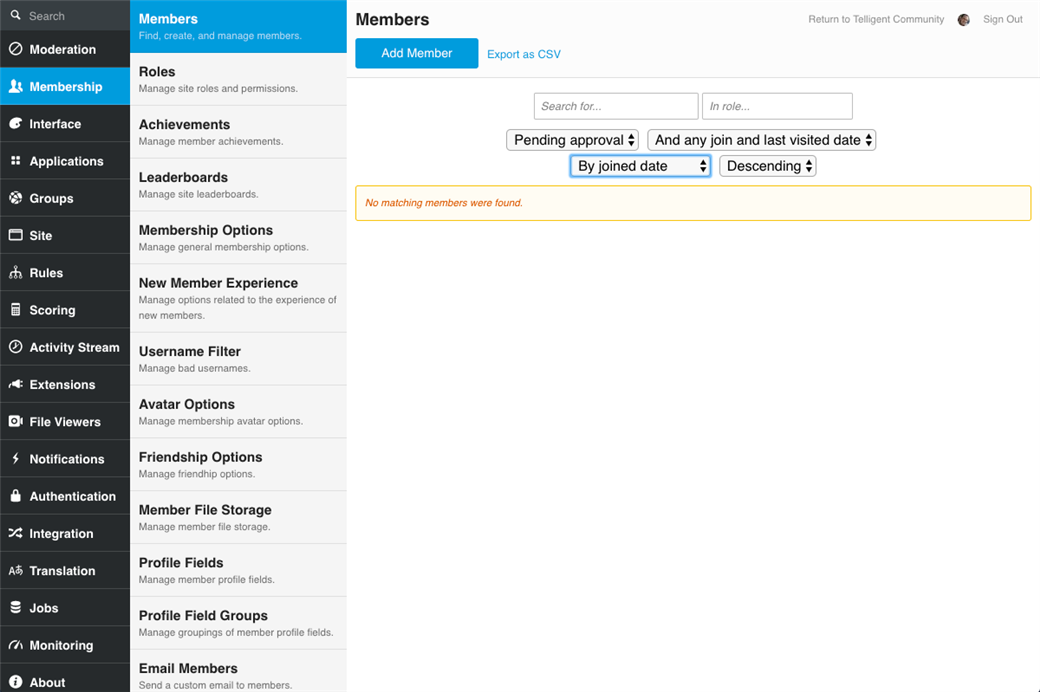
To administer members, navigate to Administration > Membership > Members:

Use the search options to find and order members:
- Search for...: Search for members by their username, display name, URL of their profile or their content, numeric ID, or global ID.
- In role...: Select or search for a role to filter the members list to only members within the selected role.
- Pending approval: Filter members to a specific membership status or any status.
- And any join and last visited date: Filter by the date when the member joined or last visited.
- By joined date: Select the order of the membership list.
- Descending: Select ascending or descending order.
At any time, you can export the list, as filtered, via the Export as CSV link in the header. When searching using the Search for... field, exact/best matches will be highlighted.
You can also use the checkboxes over the members' avatars to select one or more members to modify in bulk. When a selection is made, the Export as CSV option will only export the selected member, and Modify Members and Clear Selection options will appear in the header. Modify Members enables changing the membership status of or deleting members in bulk.
For other actions, locate the member you want to administer, select them, and then you can view the member's profile (by selecting View), edit the member (by selecting Edit) or delete the member (by selecting Delete).
Deleting a Member
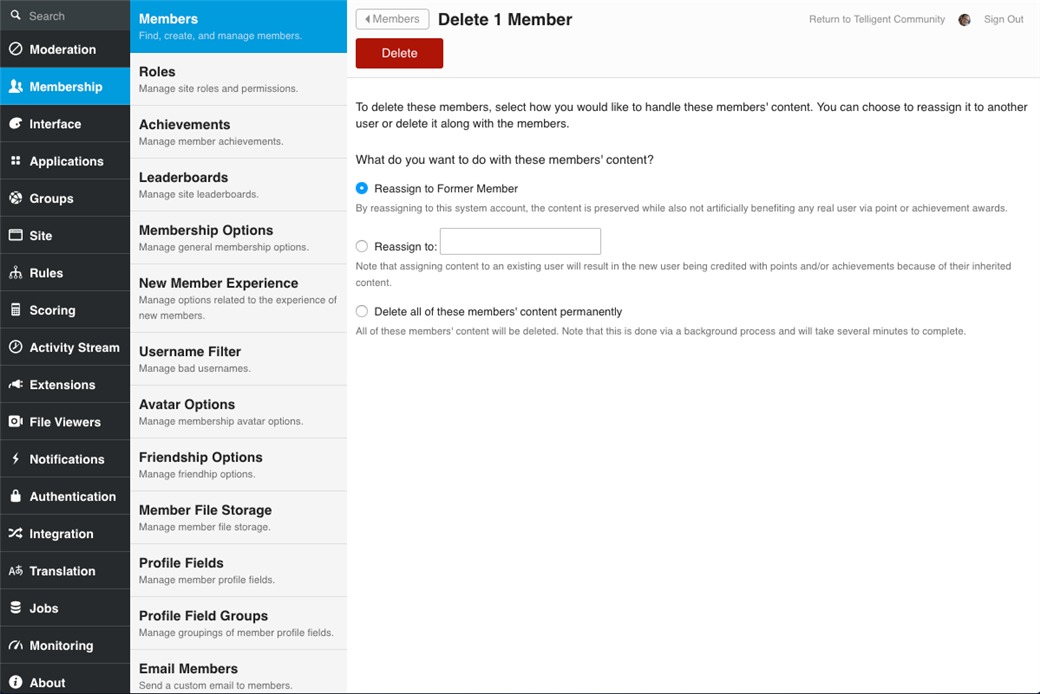
When you bulk delete a member via selection in the members list or select a single member and click Delete, you can choose how to delete the member and their content:

For members that have valuable content, it is recommended to reassign it to the special "Former Member" account to preserve the content without unnecessarily attributing authorship benefits to another user. If the account is a duplicate or it's important to designate authorship by another non-system member, select Reassign to and select the member to assign the deleted member's content to. If the member represents a SPAM account, you may want to delete all of their content and the Delete all of these members' content permanently option enables that.
When you've made your selection, click Delete to delete the member. The member's status will temporarily change to "Pending Deletion." The actual deletion will take place in a background job since content reassignment can take a significant amount of time. When the reassignment is complete, the member's account will be completely deleted.
Editing a Member
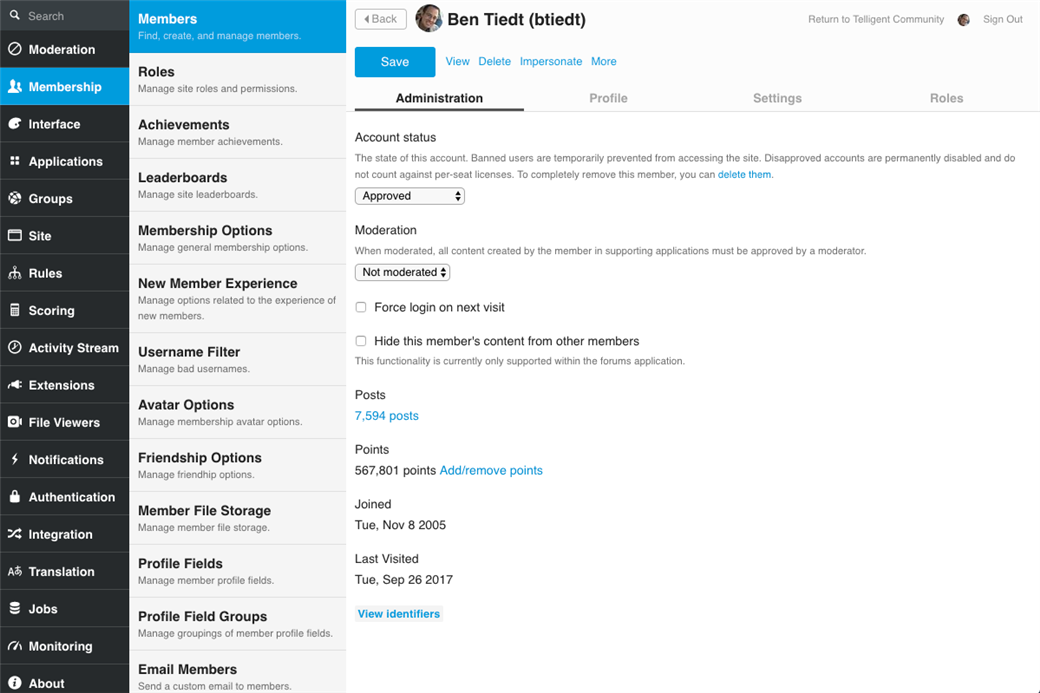
Selecting a member from the members list and clicking Edit will open the administrative edit view of the member:

From here, the header provides the following actions:
- Save: Saves any changes made to the fields available on this panel.
- View: Opens the member's community profile.
- Delete: Opens the delete options panel for this member.
- Impersonate: Initiates impersonation of this member.
Next items are located under "More"
- Change avatar: Enables changing the member's avatar.
- Change cover photo: Enables changing the member's cover photo.
- Change username: Enables editing the member's username.
- Change password: Enables resetting the member's password.
- Add/remove points: Manually add or remove points to/from this member.
- Add to role: Add this member to a role.
The tabs represent the sets of information that can be reviewed or managed for this member:
- Administration: Administration options, such as account status, moderation level, forcing login, content hiding, and statistics and identifiers.
- Profile: All data that is exposed on the member's community profile can be edited here. Note that the member's avatar and cover photo can be modified using the options in the header.
- Settings: All settings that are editable on the member's settings page in the community can be edited here.
- Roles: The member's role membership can be reviewed and modified here.
If you do make changes to the member, be sure to click Save to commit them.
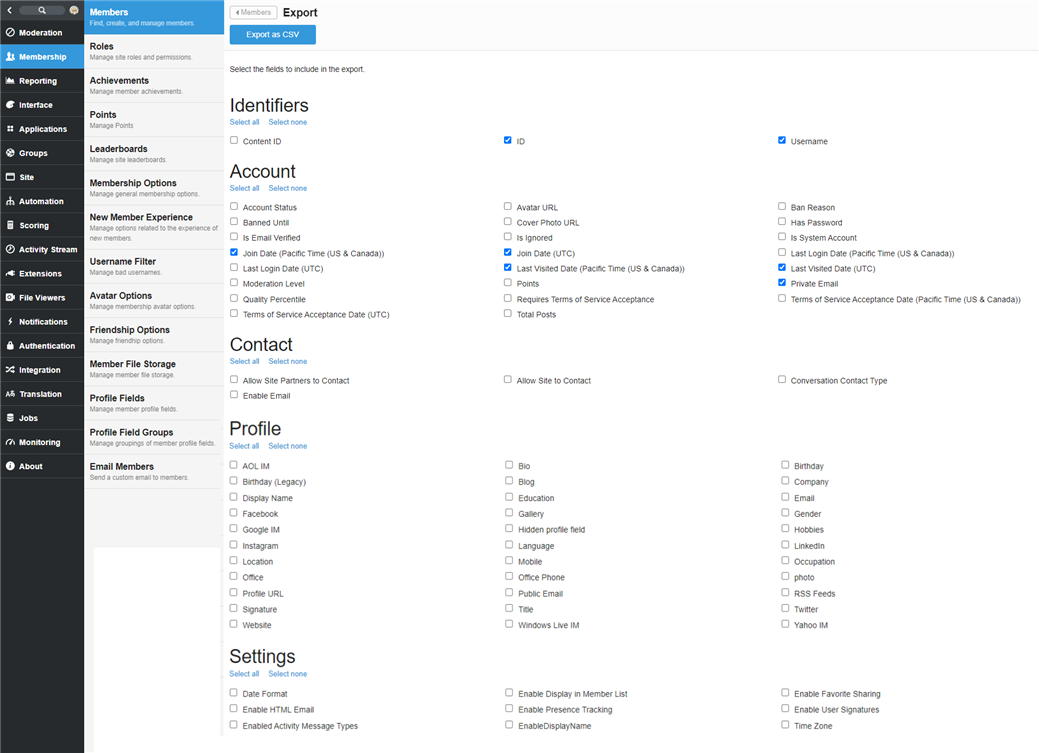
Profile Field Selections in Member Export
At any time, you can export a member list via the Export as CSV link in the header. After clicking this link you will be presented with checkboxes to select the profile fields you wish to have included in the export.


