Among other reasons, the GDPR right to erasure ('Right to be forgotten') could be a reason to allow users to delete their own accounts. While GDPR does not require that sites have self-initiated, self-deletes from within the site, enabling user self-deletes in your community could free your community managers from such tasks and allow users to do it themselves.
Setting the permission for a role
Generally, to delete a user an administrator must have the "Manage Membership" permission. However, users can delete themselves when they have the "Delete Themself" permission at the site level (note: by default this permission is not granted to registered users). When a user deletes themselves the following happens:
- All personal data is removed
- All of the content created by the user is reassigned (anonymized) to the "former member" user. The action is immediate and cannot be undone.
To grant users the ability to delete themselves:
- Identify the set of user (roles) that are allowed to delete themselves. Ex. 'Registered Users'
- Navigate to Administration > Membership > Roles. Select the role and click 'Edit'
- Select the 'Permissions' tab and check the 'Delete Themself' permission
- Click Save. Users are now able to delete themselves
Configure the user experience
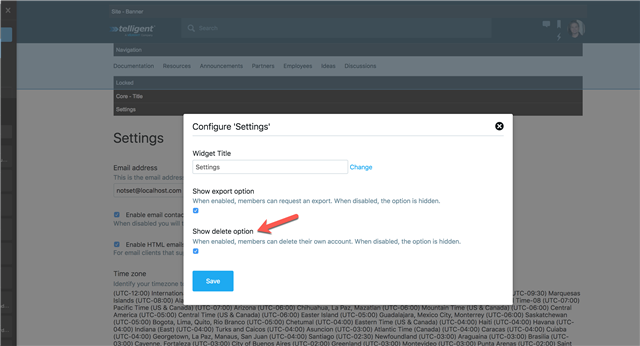
The Settings widget on the user setting page exposes a "Delete account" option on the "Options" tab under "Account." This option can be hidden from the widget by modifying the widget's configuration for sites that handle self-deletion in a more coordinated way. When exposed, the user has the delete account option: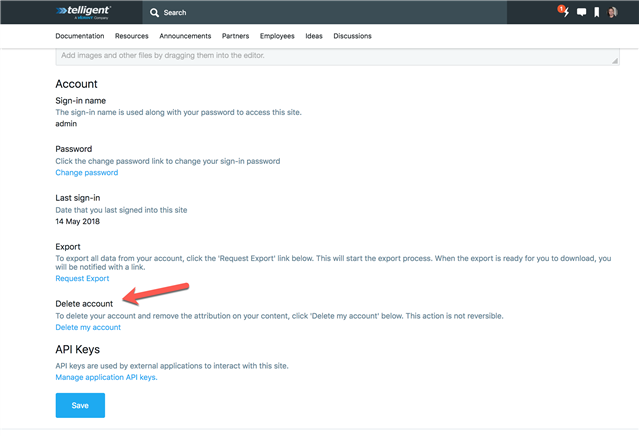
Clicking "Delete my account" opens the validation/warning modal:
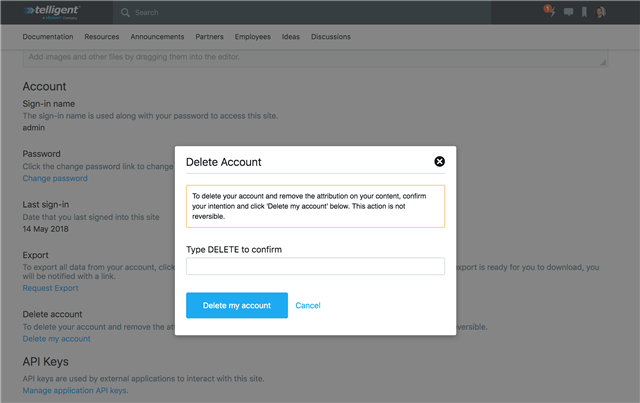
The user must type "DELETE" and click "Delete my account" to cause the deletion to occur. Once completed, the user is logged out for the last time.
The enable this functionality:
- Confirm you have properly setup the required permission (above).
- Navigate the user settings page and edit the page.
- Click the configure option for the 'Settings' widget.
- Check the 'Show delete option' and publish the changes.