
This section details the setup and configuration of the OpenID Connect plugin within Verint Community to work with Okta as the primary Identity Provider to facilitate SSO with Verint Community.
Supported Features
- Single Sign-On (OpenID Connect) initiated via Okta.
- Automatic account creation in Verint Community on initial sign in.
- Supports the OpenID Connect Implicit flow.
- Supports single and dual authentication provider (leveraging OAuth).
Requirements
- Commercial Edition License of Verint Community
- Administrator level access on Verint Community
- OpenID Connect Plugin
Configuration Steps
Please follow the steps below to configure OpenID Connect between Verint Community and Okta. The steps below are broken down into two sections, Okta side specific setup steps and then Verint Community configuration steps:
Okta Identity Provider Setup Steps
Please follow the steps below to add a Verint Community instance within your Okta org instance:
- Login to your Okta Admin console.
- From the navigation menu, select Applications -> Applications.
- Click the Add Application button, and search for the ‘Verint Community’ application and then click the Add button. (see Figure 1)
- Enter the Application label and Community URL under General Settings and click the Done button. The Application label can be the name of the community or something that identifies your community. (See Figure 2)
- Navigate to the Sign On You will need the ClientID and the OpenID Provider Metadata URL to configure the OpenID Connect.
- Make sure to assign People and Groups to your application under the Assignments tab to grant them access to your Community instance.
 Figure 1

Figure 2
Verint Community OpenID Connect Configuration Steps
Now navigate to your community and sign in. You will need administrator level permissions to access and configure the OpenID Connect plugin.
- Once you sign in, navigate and click on to the Pencil
 in the top left corner of the site.
 - The contextual administration panel will pop out. Select Administration.
- From the administration panel, select the Authentication tab.
- Select the OpenID Connect under the External Authentication Section. (see Figure 3)
- Copy the ClientID from your application instance you just created in Okta and paste it in the OpenID Connect Client ID field.
- Copy the OpenID Provider Metadata URL from your Okta application instance and paste it in the Metadata URL field.
- Select the Options. Here you can define your user profile mappings for the Email Address, Username and User Display Name.
- Select the Enabled checkbox and click the Save button. Your OpenID Connect is now enabled.
- Navigate back to the homepage. Select the Pencil in the top left corner.
- Select Manage Site Theme > Manage Pages, and search for the Login page. (see Figure 4)
- Select the Login page and click the Edit layout link.
- Search for the ‘OpenID Connect – Login Auto-Select’ widget, select the widget and then drag it over to the right and drop it on the page. (see Figure 5) Now click the Publish button.
- Assigned people will now be able to sign in.
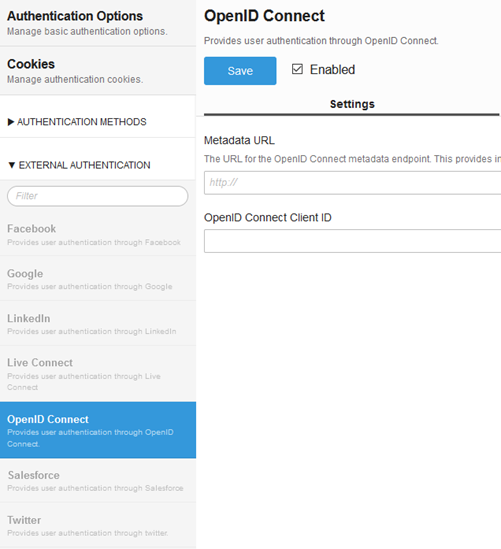
Figure 3
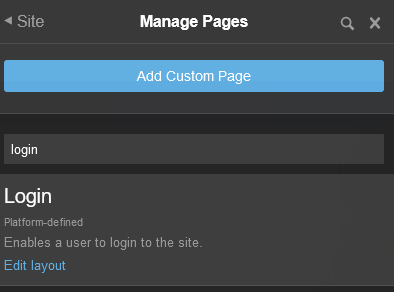
Figure 4
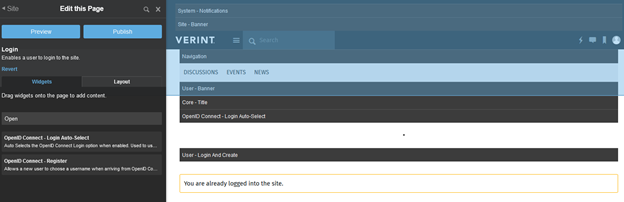
Figure 5