
Note: If you are hosted by Verint, we have options to handle email servers on your behalf if you are not able to.
To enable Verint Community to send or receive email, navigate to Administration > Email > Email Options:
This form provides part of the configuration to connect Verint Community to your email service provider:
- Enable Email - Enable email for the community. If disabled, no email will be1` sent from the community.
- Enable Email Digest - Enables registered users to receive a daily and weekly group email digest of group activity.
- Notification From Email Address - Specify the email address of your community, which is a no-reply address users see when they receive email notifications from the community.
- Email Domain - Specify the site domain name that all email addresses will be used in, such as "mysite.com."
- Email logo - Navigate to a file or revert to the default image.
Click Save to apply the settings.
Next, visit the SMTP settings. Navigate to Administration > Email > SMTP:
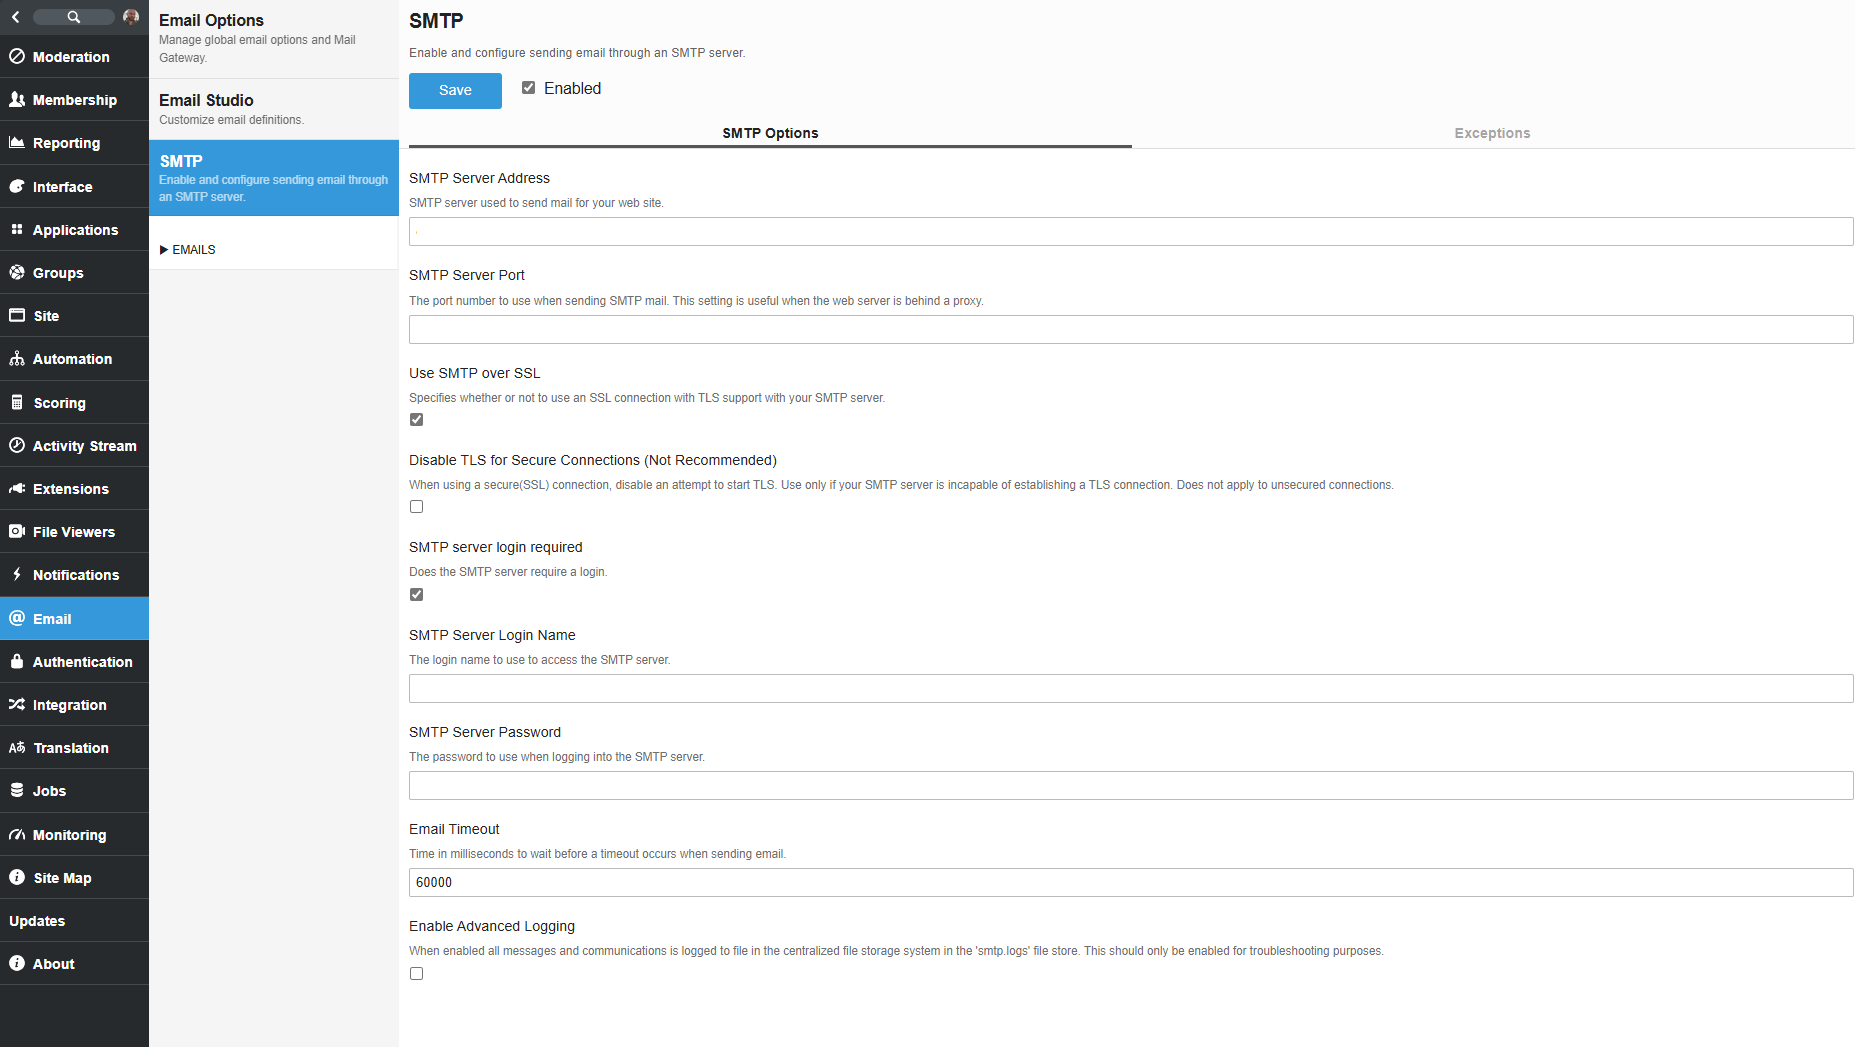
- SMTP Server Address - The SMTP server host or IP that you use to send mail for your site.
- SMTP Server Port - If required, specify the port number used for sending SMTP mail.
- Use SMTP over SSL - Enable an SSL connection with your SMTP server.
- Disable TLS for Secure Connections - Tells Verint Community to connect to SMTPS instead just SMTP. TLS will only be used if the SMTP server starts it.
- SMTP Server Login Required - Enable to require a login for the SMTP server.
- SMTP Server Login Name - If required, specify the SMTP server login name.
- SMTP Server Password - If required, specify the SMTP server password.
- Email Timeout - Time, in milliseconds, to wait before a timeout occurs when sending email.
- Enable Advanced Logging - When enabled all messages and communications will be logged to the CFS under the 'smtp.logs' file store. This should only be enabled for troubleshooting purposes.
Click Save to apply the settings.
** Please Note: Verint Community is very sensitive to email configuration mismatch. The hosts and certificates must match otherwise the connection attempt will fail.
Considerations for Mail Gateway
The mail gateway functionality enables Verint Community to read incoming email against a "catch all" email address and associate incoming email to actions within the community such as new threads or replies in forums or new blogs posts. The setup of mail gateway requires the ability to create a catch all email address and to configure the job that collects incoming email.
To configure, navigate to Administration > Email > Email Options:
- Enable Mail Gateway - Enable or disable mail gateway for the site. Mail gateway enables the community to read incoming email as requests to add content to the site, for example, for integrating forum threads with email or for enabling blog posting by email. See additional considerations for mail gateway below.
- Max attachment size (in bytes) - Allows up to this size in bytes.
- From Address Type -
- Enable message header logging - When enabled, incoming email information is logged in the event log.
Register incoming mail accounts
Verint Community has a few ways to configure incoming email:
- Create a catch-all mailbox on your mail server that receives all Verint Community messages. This is often based on domain. For example, if the community’s domain is community.website.com, then a catch-all mailbox could be set up to receive any email sent to *@community.website.com. That mailbox needs to be added to Verint Community's configuration by clicking Add New Mailbox on Administration > Site > Email Options. Verint Community will then read and process emails in that inbox.
- If your email server doesn’t support catch-all, you can use the IIS SMTP function as a catch-all.
To install the SMTP server on the job server, you will also need to ensure you have the IIS 8 management console installed from the role services for the Web Server (IIS) Role. To install the SMTP server from IIS8, open the IIS Manager, navigate to Features, and choose Add Feature. Select the SMTP Server feature.To configure it, go to the Start Menu and under Administration Tools and choose "Internet Information Services Manager." Expand the sidebar and you will see SMTP Virtual Server. Open its properties by right-clicking on it and going to Properties. First, ensure it is configured to use the IP Address for the domain (groups.company.com in our case).
Next, go to the Domains item in the sidebar under the SMTP Virtual Server. The default entry likely corresponds to the computer's name. If it isn't the subdomain for Verint, then go to Actions, New, Domain and create a new Alias entry for the Verint subdomain. This will allow it to receive email for both the default name, and the Verint subdomain.
Finally, open up the options on the default domain entry and take note of the drop directory setting. This is the location where the SMTP server will write all of the messages that it receives, so this will be where Verint Community will read messages from.
When configuring the email retrieval job in the next step, enter the drop directory into the Messages Drop Directory configuration.Ensure the MX record for the domain/site is pointing to the job server IP running SMTP and make sure the SMTP port 25 is open to receive emails.
- Create a mailbox for each mailing list the site uses. For example, if you have a forum with a mailing list of helpforum@community.website.com, you will need a mailbox on your mail server to receive those emails and then add that mailbox to Verint Community’s configuration via Add New Mailbox on Administration > Site > Email Options. This will have to be done for each mailing list used by the site. This option is not recommended as it requires the most intervention when new email integrations are enabled.
Configure the Email Retrieval job
Ensure that the Email Retrieval job is enabled by going to Administration > Jobs > Jobs > Email Retrieval and ensure that the Enabled checkbox is checked. The other configuration options provides options to enable catch all email addresses:
- Messages Drop Directory - This is the local file system directory where emails waiting to be processed as part of an IIS SMTP server integration (see the discussion in the previous section). This path must be accessible from the job server. Leave blank if you're not using this feature.
- Processed Messages Directory - Directory where emails waiting to be processed are stored. The path must be accessible from the job server. Leave blank if you're not using this feature.
Click Save to commit any changes.