

Before I start writing about the titled topic I'd just like to firstly thank the Telligent team for inviting 4 Roads to contribute to this blog. I think it says a lot about our capabilities that we are trusted to post here, so I hope that this post and any future posts we write live up to that expectation.
You may or may not be aware that 4 Roads has a set of publically available plugins that extend the Telligent community platform you can get them here and this post will be talking about these.
Initially when I started to think about what I was going to write my first thoughts were to write about each of the plugins and the individual capabilities. But after giving that some thought I decided that although interesting it doesn't really help or contribute to this blog, which is all about how to extend the platform and write code for the platform.
So instead I decided to tackle something that every public site needs when it first launches, a splash page. Splash pages are critical for new sites because they allow you to have a presence long before the site goes live, they can control access for approved beta users, gather other strategic marketing information and of course create a bit of buzz.
Let's start by thinking through the specification and documenting some of the features that the splash page plugin is going to need.
n.b. I could write user stories but for the interest of brevity let's just list the requirements
- The page must appear when the plugin is enabled
- The page must allow a user to enter some data and that data is to be stored
- The rest of site must not be accessible, unless you have a magic key
- When someone enters their details a response email should be sent thanking them
- The splash content should be easily configurable
If we look at these features then there are certain Telligent features that pop out.
- We are going to need to implement the Telligent.Evolution.Extensibility.Urls.Version1.INavigable interface to provide a URL routing for a new splash page
- We are going to need to create a widget to allow a customizable experience for the page that will need to communicate to the business logic so we need to implement Telligent.Evolution.Extensibility.UI.Version1.IScriptedContentFragmentExtension
- We are going to need to store the response data in a form that is transportable, the simplest solution is to use a secure filestore implementing Telligent.Evolution.Extensibility.Storage.Version1.ISecuredCentralizedFileStore
We are also going to need to use a few of 4 Roads specific extensions to complete this task and I will detail those as we go along. I'm also going to take some pretty big steps otherwise this would turn into an extremely long blog post. So I have assumed from the start that you are able to set up projects in Visual Studio and are familiar with nuget.
Project Structure
We tend to use a similar structure for all of our projects. We have a core plugin that implements the IPluginGroup interface. The plugin group interface has a method that allows you to specify child plugins that are enabled and disabled with the main core plugin. We also tend to try and decouple our development code from the plugin implementations, so you will see in the code that there is a SplashLogic class that does most of the work in the project. You will also notice that the core plugin implements the IBindingsLoader interface. The bindings loader interface allows you to use IoC in your project making it more unit testable (This project should have tests…..) There are some configuration options that we need to manage through the plugin so the core plugin implements the IConfigurablePlugin interface.
\src\code\FourRoads.TelligentCommunity.Splash\Plugins\Core.cs
public PropertyGroup[] ConfigurationOptions
{
    get
    {
        var group = new PropertyGroup("options", "Options", 0);

        group.Properties.Add(new Property("password", "Password", PropertyType.String, 1, string.Empty));
        group.Properties.Add(new Property("removeHeader", "Remove Header", PropertyType.Bool, 2, bool.TrueString));
        group.Properties.Add(new Property("removeFooter", "Remove Footer", PropertyType.Bool, 3, bool.TrueString));

        return new[] {group};
    }
}
We have created a struct to contain the configuration data so that we can use it in the SplashLogic class
public void Update(IPluginConfiguration configuration)
{
    _splashConfig = new SplashConfigurationDetails()
    {
        RemoveFooter = configuration.GetBool("removeFooter"),
        RemoveHeader = configuration.GetBool("removeHeader"),
        Password = configuration.GetString("password"),
    };
}
And we override the Initialize method to update the configuration of the logic class, which is bound as a singleton.
public override void Initialize()
{
    base.Initialize();

    if (_splashConfig.HasValue)
        SplashLogic.UpdateConfiguration(_splashConfig.Value);

}
The Splash Widget
In order to display a message and take some details from a interested user we are going to need a widget. To create a widget and wire up some extensions is simply a case of implementing yet another plugin. In this instance IScriptedContentFragmentExtension and the IScriptedContentFragmentExtension. The latter interface is used to create a unique container for the widgets in the control panel, we have a helper class that can read the resources from your plugin project and install them in the correct place, the FactoryDefaultWidgetProviderInstaller. My normal way of working is to implement this this plugin and then have it install a dummy widget file into the solution.
\src\code\FourRoads.TelligentCommunity.Splash\Plugins\FactoryDefaultWidgetProviderInstaller.cs
public class FactoryDefaultWidgetProviderInstaller : Common.TelligentCommunity.Plugins.Base.FactoryDefaultWidgetProviderInstaller, IInstallablePlugin
{
    private readonly Guid _scriptedContentFragmentFactoryDefaultIdentifier = new Guid("{D6456600-9937-4927-8F04-32CD79F0052B}");

    public override Guid ScriptedContentFragmentFactoryDefaultIdentifier
    {
        get { return _scriptedContentFragmentFactoryDefaultIdentifier; }
    }

    protected override string ProjectName
    {
        get { return "Splash"; }
    }

    protected override string BaseResourcePath
    {
        get { return "FourRoads.TelligentCommunity.Splash.Resources."; }
    }

    protected override EmbeddedResourcesBase EmbeddedResources
    {
        get { return new EmbeddedResources(); }
    }
}
The embedded resource class is a helper class that can read resources from your current assembly.
You can use either the control panel IDE or Visual Studio to edit and manage the widget. If you are using VS then the location of the installed widget will be \filestore\defaultwidgets\<scripted fragment factory identifier>\widgetname.xml and all extra files are located filestore\defaultwidgets\<scripted fragment factory identifier>\<widget identifier>.
Update: I would think that this can now be all done through developer mode in Telligent 9 Pre-release 3, although I've not had a chance to use it yet.
The widget needs some features that go beyond just displaying some HTML. Ideally we need to check to see if the user email is registered on the site and then ask for a secret key to gain access. We also want to collect details of users that just simply register.
Describing how to build a widget would make this a very long post, the key points I would like to extract from the process is the use a javascript file to wire up the events and perform validation. This is the code in the widget that registers a control and then calls the javascript to initialize the widget. Notice the use of UniqueId to create control id's that are unique on the page, also note that the input field uses both the id and name field, this is because the validation requires it to work correctly. The final thing to notice is the use of appropriate encoding methods so what is rendered on the client is valid HTML.
src\code\FourRoads.TelligentCommunity.Splash\Resources\Widgets\Splash.xml
#set($displayNameId = $core_v2_widget.UniqueId('displayName'))

<li class="field-item display-name">
            <label for="$core_v2_encoding.HtmlAttributeEncode($displayNameId)">$core_v2_language.GetResource('Name')</label>
            <span class="field-item-input"><input type="text" size="30" maxlength="254"  id="$core_v2_encoding.HtmlAttributeEncode($displayNameId)" name="$core_v2_encoding.HtmlAttributeEncode($displayNameId)" /></span>
            <span class="field-item-validation" style="display: none;"></span>
</li>

#registerEndOfPageHtml()
      <script type="text/javascript">
          jQuery(function(){
	          jQuery.fourroads.widgets.splash.register({
          selectors : {
              displayName: '#$core_v2_encoding.JavascriptEncode($displayNameId)',
…
          },
          urls : {
 testAccess: '$core_v2_encoding.JavascriptEncode($core_v2_widget.GetExecutedFileUrl('testaccess.vm'))',
…
          },
          resources : {
             requiredField: '$core_v2_encoding.JavascriptEncode($core_v2_language.GetResource('Required'))',
….
          }
	          });
          });
      </script>
  #end
src\code\FourRoads.TelligentCommunity.Splash\Resources\Widgets\f83a20b3310940e087bdc6c9658409c7\splash.js
saveButton.evolutionValidation({
    onValidated: function(isValid, buttonClicked, c) {
            if (isValid)
                saveButton.removeClass('disabled');
            else {
                saveButton.addClass('disabled');
            }
        },
        onSuccessfulClick: function(e) {
            $('.processing', saveButton.parent()).css("visibility", "visible");
            saveButton.addClass('disabled');
            save(context);
        }
    });

    saveButton.evolutionValidation('addField',
        context.selectors.email,
        {
            required: true,
            email: true,
            messages: {
                required: context.resources.requiredField,
                email: context.resources.validEmail
            }
        },
        context.selectors.email.closest('.field-item').find('.field-item-validation'), null)
In the save method we callback to a nvelocity file and if the user is a registered member of the site we store a hash of the secret access code. Otherwise we return a success flag if the data was submitted successfully.
src\code\FourRoads.TelligentCommunity.Splash\Resources\Widgets\f83a20b3310940e087bdc6c9658409c7\submitform.vm
$core_v2_page.SetContentType('application/json')
#if ($core_v2_page.IsPost)

	#set($response = $core_v2_user.Get("%{Email = $core_v2_page.GetFormValue('email')}"))

	#if (!$response)
		##Not a user on the site

		#if ($splash_v1.SaveDetails($core_v2_page.GetFormValue('email') , "%{DisplayName = $core_v2_page.GetFormValue('displayName')}"))
			{"result":"true"}
		#else
			{"result":"false"}
		#end

	#else
		#if ($response.Errors.Count == 0)
			##check the access code

			#set($accessCode = $core_v2_page.GetFormValue('accessCode'))

			#set($hash = $splash_v1.ValidateAndHashAccessCode($accessCode))
			#if ($hash)

				$core_v2_page.SetCookieValue("hash", $hash, "%{CookieName = 'Splash'}")

				{"result":"true" , "redirect":"true"}
			#else
				{"result":"false"}
			#end

		#else
			$core_v2_page.SendJsonError($response.Errors)
		#end
	#end
#end
By doing the widget first we have helped define the methods that we need to use in the scripted fragment extension.
Storing The Data
Obviously the whole point of a landing page is a marketing exercise to gather email addresses and pre-build your site interest. As mentioned earlier I have elected to store the data in a CSV file. This makes the data transportable and easy for other teams to manage. The data storage for the platform is all managed through the CFS interface so we need to create a custom store area for our data. To do this we create a plugin that implements the ISecuredCentralizedFileStore noticed I have used the secure version, this is so that we can restrict the access to the files in the store. The two key methods of this interface are FilestoreKey and the UserHasAccess. The key specifies the root folder name in the filestore and the UserHasAccess method confirms that the accessing user has permission
src\code\FourRoads.TelligentCommunity.Splash\Plugins\Filestore.cs
public string FileStoreKey
{
    get { return Constants.FILESTOREKEY; }
}

public bool UserHasAccess(int userId, string path, string fileName)
{
    var user = PublicApi.Users.Get(new UsersGetOptions() {Id = userId});

    if (!user.HasErrors())
    {
        return PublicApi.RoleUsers.IsUserInRoles(user.Username, new[] {"Administrators"});
    }

    return false;
}
Saving the data is a little more complex that you would first anticipate. The simple solution is to open a single CSV file and store the data. However if the site is in a web farm you need to deal with concurrency. So rather than writing a single file lets store each response as a single file.
src\code\FourRoads.TelligentCommunity.Splash\Logic\SplashLogic.cs
public bool SaveDetails(string email, IDictionary additionalFields)
{
    //To prevent conflicts each repsonse is added to a single file and then aggregated when downloaded
    ICentralizedFileStorageProvider fs = CentralizedFileStorage.GetFileStore(Constants.FILESTOREKEY);
    if (fs != null)
    {
        var header = fs.GetFile("" , _headerFileName);

        if (header == null)
        {
            StringBuilder headerBuffer = new StringBuilder();
            //Add in the headers
            headerBuffer.AppendLine(string.Join(",", EnumerateFieldsIntoList(additionalFields , (dictionary, field) => field).Concat(new []{"email"}).Select(Csv.Escape)));

            WriteFileToCfs(headerBuffer, "", _headerFileName);
        }

        StringBuilder responseBuffer = new StringBuilder();

        responseBuffer.AppendLine(string.Join(",", EnumerateFieldsIntoList(additionalFields, (dictionary, field) => dictionary[field].ToString()).Concat(new []{email}).Select(Csv.Escape)));

        WriteFileToCfs(responseBuffer, _responsesFolder, Guid.NewGuid().ToString());

        return true;
    }

    return false;
}
And then aggregate them when we want to download the full list.
public string GetUserListDownloadUrl()
{
    //Aggregate the current data into one csv file
    ICentralizedFileStorageProvider fs = CentralizedFileStorage.GetFileStore(Constants.FILESTOREKEY);
    if (fs != null)
    {
        var header = fs.GetFile("" , _headerFileName);

        if (header != null)
        {
            StringBuilder fileBuffer = new StringBuilder();

            using (StreamReader sr = new StreamReader(header.OpenReadStream()))
            {
                fileBuffer.AppendLine(sr.ReadToEnd());
            }

            //Build a new csv file
            foreach (var response in fs.GetFiles(_responsesFolder, PathSearchOption.AllPaths))
            {
                using (StreamReader sr = new StreamReader(response.OpenReadStream()))
                {
                    fileBuffer.Append(sr.ReadToEnd());
                }
            }

            return WriteFileToCfs(fileBuffer, "", "userlist.csv").GetDownloadUrl();
        }
    }

    return null;
}
The Landing Page
This is the page that will be displayed when the user is not a member of the site. To create a new page in Telligent Community you need to implement the INavigable interface. This interface has one method RegisterUrls. The interface as with many in the platform use Servant pattern and the method is passed an interface of IUrlController which itself is a plugin. The controller has 3 methods and we are going to use the AddPage method to add our page.
src\code\FourRoads.TelligentCommunity.Splash\Logic\SplashLogic.cs
public void RegisterUrls(IUrlController controller)
{
    controller.AddPage("splash","splash", new SiteRootRouteConstraint(), null,"splash", new PageDefinitionOptions
    {
        HasApplicationContext = false,
        Validate = (context, accessController) =>
        {
            if (PublicApi.Users.AccessingUser != null)
            {
                User anon = PublicApi.Users.Get(new UsersGetOptions { Username = PublicApi.Users.AnonymousUserName });
                if (anon.Id != PublicApi.Users.AccessingUser.Id)
                {
                    //If the user is a system administrator then grant access to the splash page so they can download the splash csv file, else redirect
                    if (!PublicApi.RoleUsers.IsUserInRoles(PublicApi.Users.AccessingUser.Username , new []{"Administrators"}))
                        accessController.Redirect(PublicApi.CoreUrls.Home(false));
                }
            }
        }
    });
}
The parameters are pretty straight forwards and self-explanatory, notice that I have added a lambda expression to handle when the page is accessed and the user is authenticated. In the sample code we have abstracted away all of the functionality into the SplashLogic class.
Once this plugin is registered and enabled on the site you can then access your page and put the widgets on it, there are a number of ways to do this but I find the easiest is edit the page and then export the XML. 4 Roads has a special plugin FactoryDefaultPageLayoutInstaller that is able to read resources from an assembly and install them into the site. Now we have a page we need to create a widget to put on it.
Headers and Footers
One of the things about a splash page is that it is completely different from the rest of the site. This means that the standard Telligent headers and footers may not be displayed. There are a number of ways to achieve this one option is to create a completely custom theme and remove all page layouts except for the splash page. This option would work but you would not be able to allow any Beta users into the site to test or play around. Fortunately we can leverage something from one of the other common plugins that we produce. The micro data and performance plugins both use CSQuery to hook into the rendering of the page, we can use the same principle and remove the header and footer content. The core plugin is now inherited from CQObserverPluginBase this requires the implementation of GetProcessor() which returns the SplashLogic instance.
src\code\FourRoads.TelligentCommunity.Splash\Logic\SplashLogic.cs
public void Process(CQ document)
{
    if (_configuration.HasValue)
    {
        var pageContext = PublicApi.Url.ParsePageContext(HttpContext.Current.Request.Url.OriginalString);

        if (pageContext != null && pageContext.PageName == _pageName)
        {
            if (_configuration.Value.RemoveHeader)
            {
                document.Select(".header-fragments").Remove();
            }

            if (_configuration.Value.RemoveFooter)
            {
                document.Select(".footer-fragments").Remove();
            }
        }
    }
}
Hooking Page Requests
One of the final things to handle is the redirection of pages when a user tries to access the site. Again there are a number of ways this can be done. For now I have elected to use an event handler for the PublicApi.Users.Events.AfterIdentify if the user is not authenticated the cookie is checked for and if not found the page is redirected. The drawback of this method is that the event is called for all requests and we need to work around requests that are valid such as javascript files and theme files. The alternative is to write a widget that is place on the footer of every page of the site which would work but would be a little more risky if it got removed by accident.
src\code\FourRoads.TelligentCommunity.Splash\Logic\SplashLogic.cs
protected void EventsAfterIdentify(UserAfterIdentifyEventArgs e)
{
    if (_configuration.HasValue)
    {
        if (PublicApi.Users.AccessingUser.Id == PublicApi.Users.Get(new UsersGetOptions() {Username = "anonymous"}).Id)
        {
            string urlRequest = HttpContext.Current.Request.Url.LocalPath;

            var pageContext = PublicApi.Url.ParsePageContext(HttpContext.Current.Request.Url.OriginalString);

            if (pageContext != null && pageContext.PageName != _pageName && !CentralizedFileStorage.IsCentralizedFileUrl(urlRequest) && !(urlRequest.EndsWith(".js") || urlRequest.EndsWith(".axd") || urlRequest.EndsWith(".ashx") || urlRequest.IndexOf("socket.ashx") >= 0))
            {
                HttpCookie cookie = HttpContext.Current.Request.Cookies["Splash"];

                if (cookie == null || cookie["hash"] != GetPasswordHash())
                {
                    HttpContext.Current.Response.Redirect("/splash" + "?ReturnUrl=" + PublicApi.CoreUrls.Home(false), true);
                }
            }
        }
    }
}
Wrapping Up
Pulling all of the above elements together into a solution you end up with a splash screen.
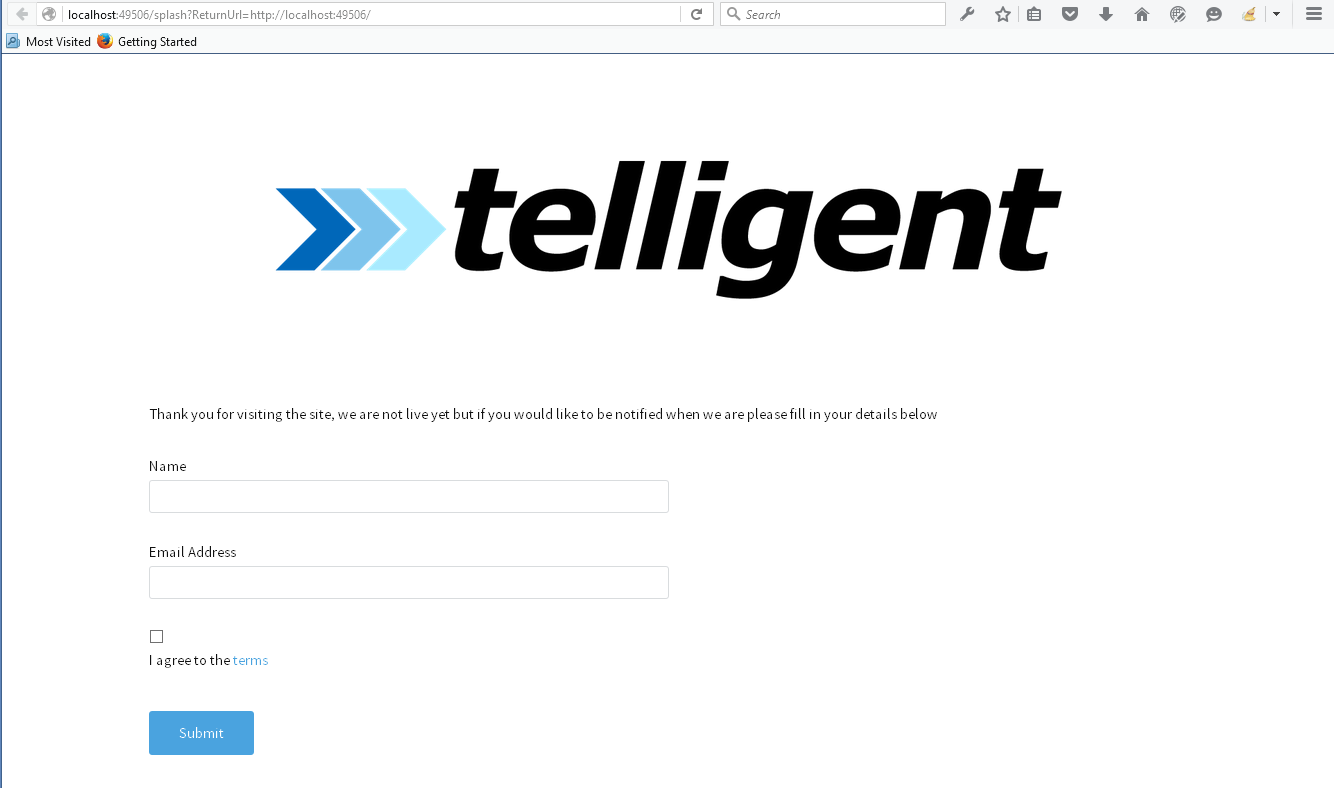 However as I have worked through this example I have realized that actually this is a fairly big topic to try and cover in one post. However I hope I have touched on the key elements that allow you to construct a fairly complex plugin extension to the platform. Please do go take a look at the code on Git and feel free to post questions here and I will answer them. If you want to see the splash screen in action take a look at this site.