The platform allows developers to extend the content editor to provide for richer content.
[toc]
Why Extend the Content Editor?
The content editor allows the input of html, images and video, but other types of content cannot be entered or would be difficult to enter. The platform provided extensions to the content editor are good use cases for what extending the content editor can provide.
Source Code with Syntax Highlighting
Source code can be entered into the editor without an extension, however each user would be responsible for providing the styling for the source code they enter. By extending the editor to allow for consistent styling and syntax highlighting to be determined by the platform.
Polls
Polls on the other hand would not be possible without an extension to the editor. With polling the editor is extended with an interface to allow polls to be entered, rendered and the data to be stored in a custom set of tables.
Creating an Extension
The platform provides IEmbeddableContentFragmentType interface, the interface can be found in the Telligent.Evolution.Api.Dll. This interface allow new types of content to be entered into the editor.
This example will created a new EmbeddableContentFragmentType that displays a box inside the content. The background color of the box will be configurable when inserting the content.
First we will need to provide a unique id (EmbeddedContentFragmentTypeId), name (ContentFragmentName) and description (ContentFragmentDescription) for our content fragment type. We will use the ITranslatablePlugin interface to provide translations for the name and description.
readonly Guid _fragmentTypeId = new Guid("6c33babb0c0e45e8b691294b8b6569e5");

public string ContentFragmentName
{
    get { return _translation.GetLanguageResourceValue("fragment_name"); }
}

public string ContentFragmentDescription
{
    get { return _translation.GetLanguageResourceValue("fragment_description"); }
}

public Guid EmbeddedContentFragmentTypeId
{
    get { return _fragmentTypeId; }
}
We can limit the types the content that can be used when embedding our new content fragment type. In the example we will allow all types, so we will just return true. If we wanted to limit our new type to only be allowed in blog posts, we could return true only when the contentTypeId parameter matches the blog post content type id.
bool IEmbeddableContentFragmentType.CanEmbed(Guid contentTypeId, int userId)
{
    return true;
}
The EmbedConfiguration property is used to define the interface for entering the data needed to define the embed. In this case, we will allow the user to choose the background color of the embedded box, so we define a single property with the PropertyType of Color.
PropertyGroup[] IEmbeddableContentFragmentType.EmbedConfiguration
{
    get
    {
        var group = new PropertyGroup("options", _translation.GetLanguageResourceValue("configuration_group"), 1);
        group.Properties.Add(new Property("color", _translation.GetLanguageResourceValue("configuration_color"), PropertyType.Color, 1, ""));
        return new PropertyGroup[] { group };
    }
}
The Validate method is provided to verify that the data entered by the end user is correct. A translated error may be returned to the end user to assist in correcting any invalid data.
EmbeddableContentFragmentValidationState IEmbeddableContentFragmentType.Validate(IEmbeddableContentFragment embeddedFragment)
{
    var color = embeddedFragment.GetString("color");

    if (string.IsNullOrEmpty(color))
        return new EmbeddableContentFragmentValidationState(false) { Message = _translation.GetLanguageResourceValue("configuration_colorinvalid") };

    return new EmbeddableContentFragmentValidationState(true);
}
The AddUpdateContentFragments method is called whenever embedded content is added or updated. This can be used to create, update and delete database records for the embeds. This example does not need to use this method, so we will leave it blank.
void IEmbeddableContentFragmentType.AddUpdateContentFragments(Guid contentId, Guid contentTypeId, IEnumerable<IEmbeddableContentFragment> embeddedFragments)
{

}
The preview image is what will be displayed when in the editor to represent the embedded content. For this example, we can just leave this blank and allow the platform to provide an image.
string IEmbeddableContentFragmentType.PreviewImageUrl
{
    get { return null; }
}
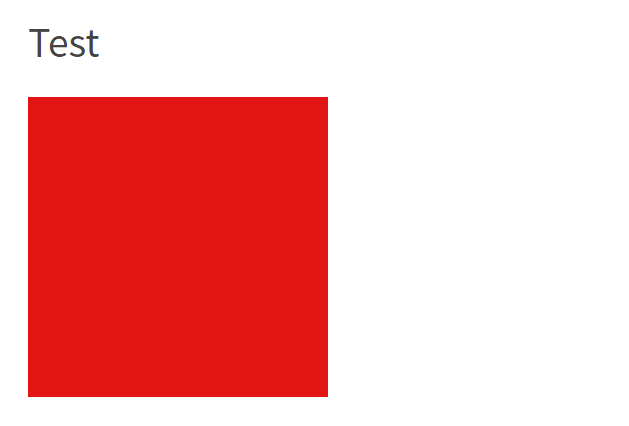
The Render method is called when our content is being output. A target parameter is also provided, this can be useful if you want to display different output for different targets. The example will read the color parameter we defined in the EmbedConfiguration property. If the color has been set, we will render a div with a fixed height and width and the selected background color.
string IEmbeddableContentFragmentType.Render(IEmbeddableContentFragment embeddedFragment, string target)
{
    var color = embeddedFragment.GetString("color");

    if (String.IsNullOrEmpty(color))
        return String.Empty;

    return String.Format("<div style='height: 300px; width: 300px; background-color: {0};'> </div>", color);
}
Completed source code for the Sample IEmbeddableContentFragmentType:
using System;
using System.Collections.Generic;
using System.Globalization;
using System.Linq;
using Telligent.DynamicConfiguration.Components;
using Telligent.Evolution.Extensibility.EmbeddableContent.Version1;
using Telligent.Evolution.Extensibility.Version1;
namespace Samples
{
public class SampleEmbeddable : IEmbeddableContentFragmentType, ITranslatablePlugin, IPlugin
{
readonly Guid _fragmentTypeId = new Guid("6c33babb0c0e45e8b691294b8b6569e5");
ITranslatablePluginController _translation;
#region IEmbeddableContentFragmentType Members
public string ContentFragmentName
{
get { return _translation.GetLanguageResourceValue("fragment_name"); }
}
public string ContentFragmentDescription
{
get { return _translation.GetLanguageResourceValue("fragment_description"); }
}
public Guid EmbeddedContentFragmentTypeId
{
get { return _fragmentTypeId; }
}
bool IEmbeddableContentFragmentType.CanEmbed(Guid contentTypeId, int userId)
{
return true;
}
PropertyGroup[] IEmbeddableContentFragmentType.EmbedConfiguration
{
get
{
var group = new PropertyGroup("options", _translation.GetLanguageResourceValue("configuration_group"), 1);
group.Properties.Add(new Property("color", _translation.GetLanguageResourceValue("configuration_color"), PropertyType.Color, 1, ""));
return new PropertyGroup[] { group };
}
}
void IEmbeddableContentFragmentType.AddUpdateContentFragments(Guid contentId, Guid contentTypeId, IEnumerable<IEmbeddableContentFragment> embeddedFragments)
{
}
string IEmbeddableContentFragmentType.PreviewImageUrl
{
get { return null; }
}
string IEmbeddableContentFragmentType.Render(IEmbeddableContentFragment embeddedFragment, string target)
{
var color = embeddedFragment.GetString("color");
if (String.IsNullOrEmpty(color))
return String.Empty;
return String.Format("<div style='height: 300px; width: 300px; background-color: {0};'> </div>", color);
}
EmbeddableContentFragmentValidationState IEmbeddableContentFragmentType.Validate(IEmbeddableContentFragment embeddedFragment)
{
var color = embeddedFragment.GetString("color");
if (string.IsNullOrEmpty(color))
return new EmbeddableContentFragmentValidationState(false) { Message = _translation.GetLanguageResourceValue("configuration_colorinvalid") };
return new EmbeddableContentFragmentValidationState(true);
}
#endregion
#region IPlugin Members
string IPlugin.Description
{
get { return "Displays a box with configurable height."; }
}
void IPlugin.Initialize()
{
}
string IPlugin.Name
{
get { return "Sample Embeddable"; }
}
#endregion
#region ITranslatablePlugin Members
Translation[] ITranslatablePlugin.DefaultTranslations
{
get
{
var translation = new Translation("en-us");
translation.Set("fragment_name", "Embeddable Box");
translation.Set("fragment_description", "Displays a box with configurable height.");
translation.Set("configuration_group", "Options");
translation.Set("configuration_color", "Background Color");
translation.Set("configuration_colorinvalid", "A Background Color must be provided.");
return new Translation[] { translation };
}
}
void ITranslatablePlugin.SetController(ITranslatablePluginController controller)
{
_translation = controller;
}
#endregion
}
}
Once the plugin has been deployed and enabled in the community, when creating a post you will see the option to "Insert Embeddable Box"
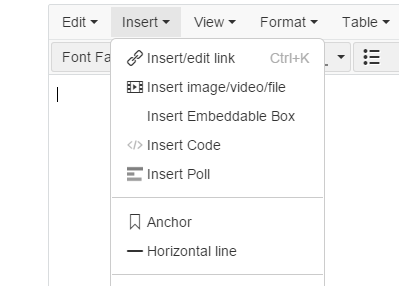
Select that option and you will be able to configure the background color

After submitting this form, the editor will display the embeddable content using the previewimageurl provided in the code. After creating the post, you should see the box rendered with the chosen background color.