Page editing is contextual
With release 10.0, page editing is in the Management panel. In this release, the page you can edit determines the theme you can edit. For example, if you can edit the site home page, you will be editing the site theme. This means you have the Site - Edit Theme permission. If you can edit a group home page, you can edit the group theme. This means you have the Group - Edit Theme permission. If you can edit a blog, you can edit the blog theme. This means you have the Blog - Edit Theme permission. If you can edit your profile page, you can edit the user theme. The means you have the Site - Edit User Theme permission.
Here are some notes about using the mode:
- Pages and editing options are contextual to the page you are editing; for example, an individual's dashboard displays different options from a group home page.
- Context specifies the widgets available for the entire site; in groups; on blog pages, and on user dashboards. When you enter Edit mode on one of these areas (or select a page in it), the chosen widgets are selectable.
- You can access any page on the site contextually using the Management panel Pages button. For example, from the profile page you can access the login/logout page.
-
If you export a page containing widgets with scoped properties, they could affect other pages upon import. You can opt in or out of including scoped changes in the import through widget studio.
Enter Edit Page mode
This procedure outlines editing a dashboard or home page. (For editing other pages, please see "Select a page to edit" for accessing the page.)
- Click the pencil tool.
- In the upper portion of the Management panel, click Modify [X] Theme. The Modify [X] theme panel appears.
- If you click this option on the site home page (the user dashboard), the Modify User Theme option appears.
- If you click this option on a group home page, the Modify Group Theme option appears.
- If you click this option on an application home page, the Modify [X application] option appears.
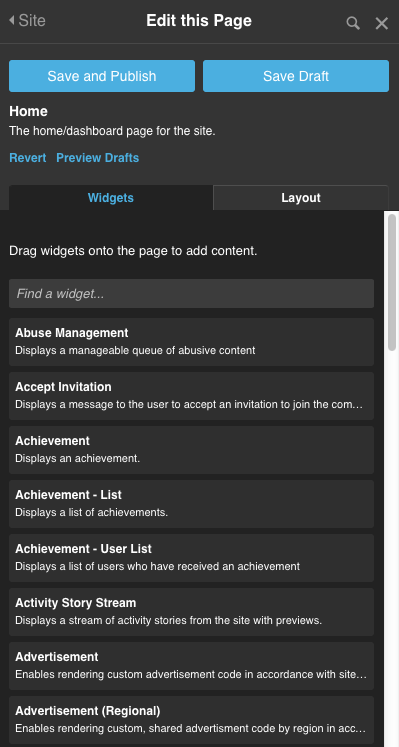
- Click Edit this page. The Edit this Page panel appears, making the Save, Revert, and Preview options visible and the Widgets and Layout tabs available. The Widgets tab displays a widget search box.

Open the header, body, or footer
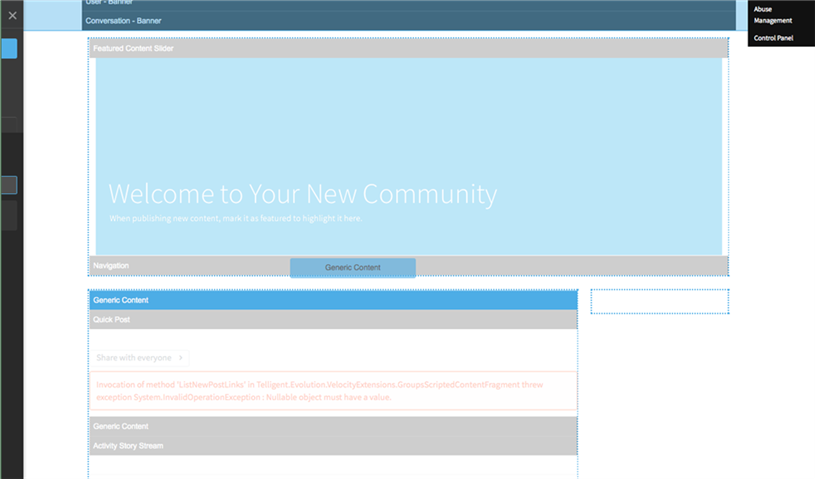
To open the page header, open page editing. Then mouse over the header area and click Edit header. Note: The User - Banner widget, which handles navigation, is located in the header.
To open the body, open page editing. Then mouse over the page body and click Edit page.
To open the page footer, open page editing. Then mouse over the footer and click Edit footer. Note: The page Tour Tips widget is located in the footer.
Edit the header, body, or footer
Open the header, page body, or footer in Edit Page mode. The editor appears.
Edit the page layout
You can edit the page layout (not header or footer layout).
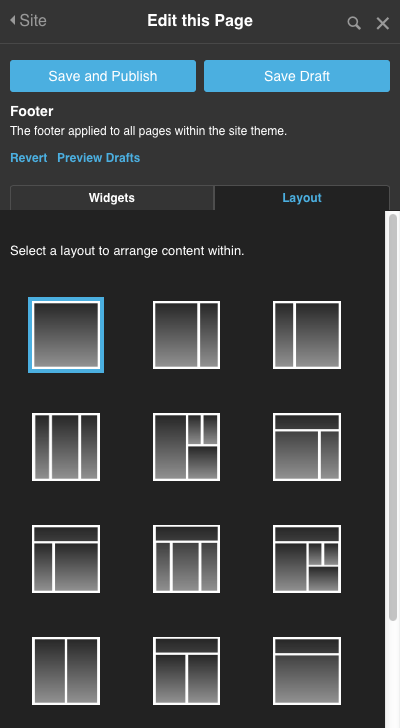
- In the Edit Page panel, click the Layout tab. The layout styles appear.
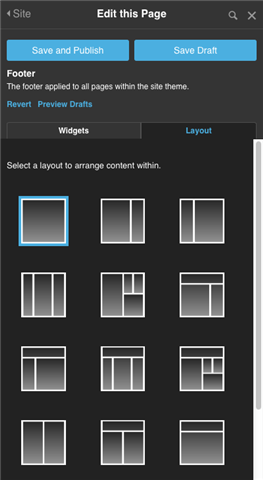
- Click the desired layout. The page layout changes dynamically.
- If desired, you can Save draft (save a draft of the page) and click Preview drafts. This will open the page view in a browser tab or window, and will change dynamically as you make layout and widget changes.
- Click Save and publish to publish your changes.
Edit the widgets
Choose a widget
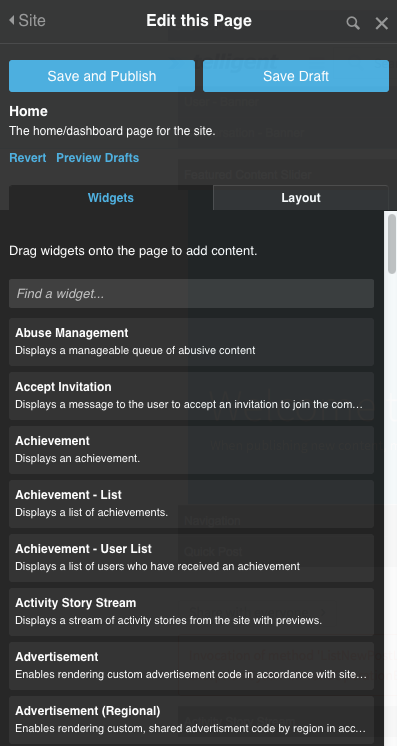
- In the Edit Page panel, click Widgets. The widget list appears.
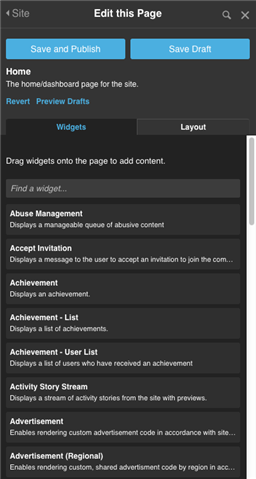
- Locate the desired widget. You can either start typing the widget name in the "Find a widget" search field, or scroll down through the list of widgets.
- Drag the widget to the desired location. As you drag, the regions where you can place the widget are outlined.
- Drop the widget where desired. It is not placed until you see the widget in one of the regions.

Format the widget
- Click in the widget menu bar. The widget editing options appear.

- Click Format. The widget formatting options appear:
- No border with no spacing - No border appears around the widget; the spacing is less than with spacing, and the widget title is not displayed.
- No border with spacing - No border appears around the widget, however there is more spacing than with the "no spacing" option.
- No border with spacing and header - No border appears around the widget, however there is a larger amount of spacing, and the widget title appears.
- Top border - Only a top border appears on the widget. There is less spacing than the "with spacing" options.
- Choose the desired option. You can try multiple options. The one you select last (and leave) is the one that will be applied.

Choose the responsive behavior
- Click the widget menu bar. The widget editing options appear, which have to do with how the widget appears on single column layout such as on mobile devices.
- Click Responsive behavior. The responsive behavior options appear:
- Always shown, Priority 1 in single column mode - This widget will appear before priority 2 and 3 widgets.
- Always shown, Priority 2 in single column mode - This widget will appear after priority 1 and before priority 3 widgets.
- Always shown, Priority 3 in single column mode - This widget will appear after priority 1 and 2 widgets.
- Only shown in single column mode - This widget displays, in single column mode, where you place it. It could displace any or the priority widgets in position.
- Hidden in single column mode - This widget is not displayed in single column mode.
Configure the widget
Click Configure. The configuration window appears. Configuration options vary by widget.
Save the page
- In the Edit Page panel, click Save. The modified and unmodified sections of the page appear in a grid.
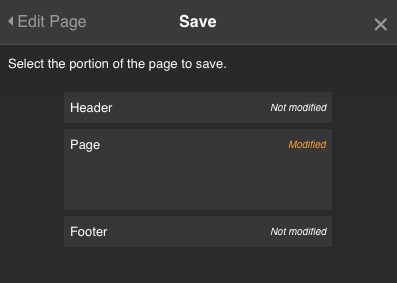
- Click the portion of the page to save. You only need to save the portion(s) which were modified. For example, if you changed a widget on the header, the header will say "Modified," and you will need to save it. If you modified both the header and the page, you will save one portion and then the other. If you select the header, you will not be prompted to choose a save option. If you edit the page, you will be prompted to choose a save option:
- Save for this user/group/blog only - The changes will only apply for the contextual user (such as the logged in user or the impersonated user); group, or blog.
- Save as the default for every user/group/blog - The changes will only appear to those users, groups, or blogs using the default layout and widgets. If a user or group/blog owner customized the dashboard, the changes you make will not appear for them.
- Save as the default and revert customizations for every user/group/blog - All user, group, or blog themes will be affected, and those who customized their themes will have the changes rolled back to the version you save.
- Click your choice. The portion is saved. If you modified more than one portion, you may need to navigate back by clicking Edit Page to save the unsaved portion.

Revert a header, footer, or page
In the case that you saved a page/header/footer version and want to undo those changes, you can click Revert. This button will only occur on modified areas.
- Click Revert. The portion grid of the page appears.
- Click the portion of the page to be reverted. Any changed or customized page will be indicated in the grid. You will be prompted with the following choices:
- Undo all unsaved changes - Any changes that have not been saved (from this edit session) will be removed.
- Revert to default - Changes made for the user/group/blog since the last save as default will be removed and the default page will be used.
- Revert every user/group/blog to the factory default - Any changes to the default as well as any changes in this editing session to the user/group/blog will be undone, and the factory default for the theme will be applied.
- Click your choice. The chosen reversion will be applied.